


.png)
.jpg)
(1).jpg)
(1).jpg)
(1).jpg)
(1).jpg)
.jpg)
.jpg)
.jpg)
.jpg)


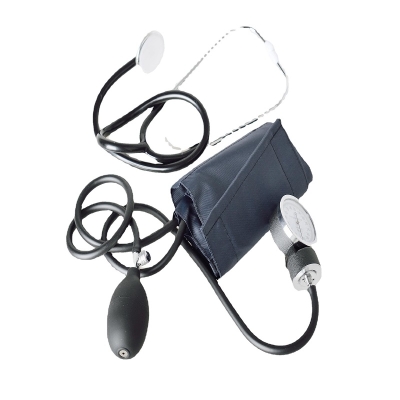

Straps: nylon, 40*500MM
Ball, bag: PVC
Measuring range: 0-300mmHg
Others: Ordinary air valve
Stethoscope: Single use stethoscope
Independent packaging: neutral color box, human leather bag
Product weight: 443g
Product size: 195*210*70MM
Outer box size: 55*37*37CM
50PCS per box
Gross weight 24kg
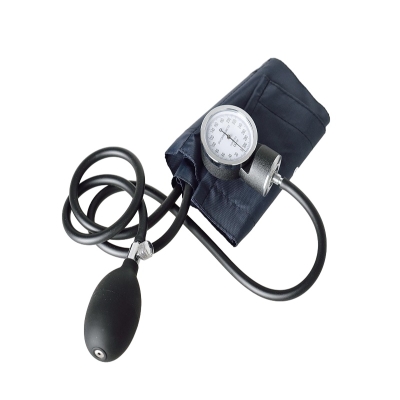
Measuring range: 0-300mmHg(0-40kPa)
National standard error ±3.75mmHg, factory error ±2mmHg
Measurement method
1. Before putting the blood pressure meter into use, check it first. A blood pressure meter that can be used normally will have the dial pointing at the "0" position. After pressurization, the dial will respond flexibly and can still return to the "0" position.
2. Ask the subject to sit at the table, place his left arm lightly on the table, and maintain a comfortable posture.
3. Adjust your arms to be at the same height as your heart. If the height is not high enough, add soft pads under your arms.
4. Flatten the armband so that the middle part of the airband faces the brachial artery. The lower edge of the armband reaches 2 to 3 cm above the cubital fossa and is tied to the upper arm. It should not be too tight or too loose. Generally, two fingers should be able to be inserted under the cuff. It is advisable to avoid affecting the accuracy.
5. Insert the listening head of the stethoscope into the armband and place it on the brachial artery of the elbow.
6. Use a latex ball to inflate the arm slowly into the armband, while paying attention to monitoring. When the brachial artery pulse disappears, increase the pressure by 2.5kPa-4kPa (20mmHg-30mmHg) and stop inflating.
7. After the pressurization stops, slowly release the air in the arm band at a speed of 0.3kPa-0.6kPa (2mmHg-4mmHg) per second, so that the blood pressure meter pointer gradually drops.
8. The pressure value indicated by the needle when the first pulsating sound is heard through the stethoscope during the descent is the systolic blood pressure.
9. When the beat sound turns into a murmur after gradually increasing in intensity, then the tone suddenly becomes muffled and gradually disappears. When no sound is heard, it is diastolic blood pressure.
*When measuring blood pressure, it should generally be repeated 2 to 3 times, and the average reading should be used as the blood pressure value.
*The back of the blood pressure meter case is equipped with a metal hook, which can be hung on the armband during use to make readings more convenient.